Pages

Friday 30 January 2015

A Weighty Issue

LilySlim Weight loss tickers 

I don't normally post anything particularly personal
on my blog, but have decided to announce quietly on here
 
 
I'VE LOST SOME WEIGHT!!

I've been keeping track on the above ticker which shows
the position at last weekend, but having sneakily weighed
myself today see that I've reached the three stone loss milestone (again).
 
The diet started last June and just before Christmas I did
lose a total of three stone, then over the Christmas period put back
on half a stone.  It took me 6 months to lose 3 stone and
6 days to put half a stone back on again!
That's precisely why I need to diet and check my food intake.
Unless I do, I simply pig out - tsk, tsk!!

John, my husband is also dieting and he's lost two stone.
He has a sedentary job, drives to and from work and does no
exercise as such so I think that's why I've lost more.
I don't actually do any exercise myself, although not being
able to drive means I walk everywhere, so that keeps me moving!
 
We've been following an old WeightWatchers points plan
- doing it ourselves at home.  I lost weight years ago through
the 'WW 123 Success' plan and still had all the booklets I got
from the meetings so decided to re-start with them.
 
The basic premise is to eat less saturated fat and move more!

I can't say it's been easy and it really is a long slow process,
but we're getting there, slowly but surely - but there's still
a long way to go yet.
 
All the various food lists, booklets, and recipes etc
I've been keeping in a plain blue folder (the type which
has plastic pockets inside)
 
 
This folder is constantly visible on the kitchen counter and
I got fed up with the bright blue colour of it, so decided to
alter it a little.
 
I bought this little 'Housewife' magazine (dated November 1946)
 a few years ago at a car boot sale.
 
 
It makes a great read and is full of adverts.
I took a deep breath and tore some of them out!!
 
 
 I covered the blue folder first with a combination of Decopatch and
old music papers in a suitably vintage colour - in keeping with
the age of the adverts.

I inked around the adverts with some distress ink
which seemed ridiculous really bearing in the mind they
are almost seventy years old.
 
 
To finish the cover off I bought a new Bigz die
from the Sizzix sale called 'Vintage Scale'
it comes with an embossing folder so has some
nice textured detail.  I cut the scales from patterned papers,
and edged them with distress ink and metallic paste.
 
 
Much nicer than the bright blue plastic folder :)
 
My personal target is to lose another two stone -
 so there's a long way to go .....
wish me luck!
 
..... now, it's Friday night, where's that
takeaway menu? ...... If only!!


Thursday 29 January 2015

Butterfly Challenge


I'm entering this card in the lovely Mrs A's
where the current theme is
 'Butterflies and V is for Valentine'.

The jar was cut from a Sizzix Bigz die
imaginatively named 'jar'.
I cut it from vellum which had butterflies printed on it.
Around the jar I wrapped some more
vellum, lace and ribbon and added a small
tag stamped 'with love' - for the Valentine theme.

Under the jar is a heart shaped doily
(trimmed to fit the card)
which I coloured with 'Victorian Velvet' Distress Ink.

Short and sweet!

Thanks for looking :)


Friday 23 January 2015

PaperArtsy Blog Challenge No. 2: Shiny Stuff


I'm joining in again with PaperArtsy's next challenge
"Shiny Stuff".
Here's what Leandra says on her blog
"it's time to get in touch with your inner magpie! We are exploring metals, mica, beads, wire, jewellery, paint effects, Treasure Gold, in other words, all things shiny, rusty or metallic."
All the details may be found here
along with a YouTube video from Leandra which is what
actually inspired me to join in.

I made a paper sewing fairy called Phoebe (that name
apparently means bright, radiant and shining).

I'll show below with photos and not too many words how I made her.

 
 I used a stamp from Character Constructions
and some shiny plumber's tape which I roughed up a bit.


 I stamped onto card painted with 
Fresco Finish 'Sage' colour and stamped
the bodice part again onto the silver tape and layered it up.
The face is moulded from air dry clay.

 
I made the wings and bobbin feet with more of the silver tape
 stuck onto card and embossed with my Big Shot machine.
I coloured them randomly with a mixture of Viva Precious Metal Colour
and Alcohol Inks.  


 She's looking shiny!  
Next I added the arms with silver brads
and machine stitched the wings on.


With some 0.6 gauge silver coloured jewellery wire, I made
a cage to replicate the bottom of the dress form.

 
 Attached the face and wool hair with E6000 adhesive
and a wire hanging

(a hairbrush wouldn't go amiss!)
   

 Not very shiny at the back, but it's always good (I think) to
see how things are put together.

This current challenge runs for another 15 days so there's
plenty of time to get involved.

Thanks for looking :)

Wednesday 21 January 2015

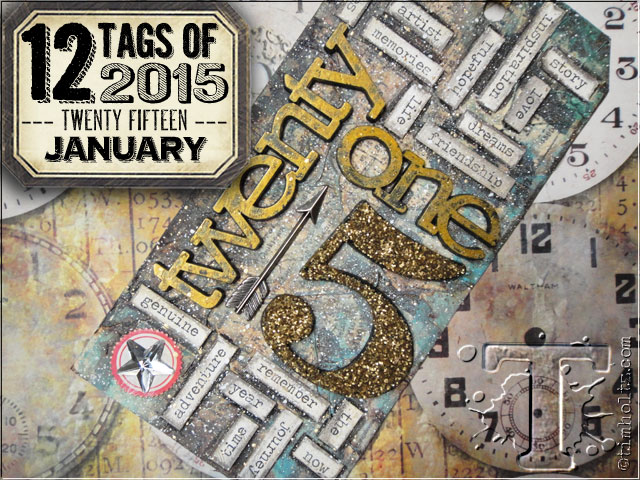
12 Tags of 2015 - January

12 tags of 2015 - January | www.timholtz.com 

I shall start the year off with good intentions and join
in once again with Tim Holtz' 12 Tags of 2015.
Last year I got as far as September - let's see if I can
beat that this year!

  A click on the above photo (copied from Tim Holtz blog)
should take you to the post describing how his January tag was made.

It goes without saying (but I'll say it anyway!), 
that I didn't have all the products used in the making of Tim's tag.

Here's some of what I did use.


 ... and here's my finished tag


The face is one I painted a while back and as it was 
on my desk - and the colours were similar to what I
used for the tag, I decided to include it.

The quote is one I found on Pintrest, just printed
onto copy paper and shadowed with a
Black Soot Distress Marker.


 I like that quote!

Thanks for looking & I wonder what Tim has in store
for next month's tag!


Tuesday 20 January 2015

Atten-shun!

Have I got your attention now?  Good!

Just a quick short post to show a birthday card I
made recently for a little boy.


I used the 'Toy Soldier' Sizzix Bigz die from the
Tim Holtz/Alterations range.
I cut the pieces from felt and distressed it slightly 
with distress inks.


The background is cut from a roll of wrapping paper,
mounted onto a piece of card and distressed with
some white acrylic paint.
The black border is just a black felt tip edging.

I must admit when I saw this wrapping paper
a couple of years ago now, 
I bought it with the sole intention of using it with this die -
and hey I did!  Better late than never :)

OK, you can stand easy now ....
and thanks for looking of course!


Thursday 8 January 2015

PaperArtsy Blog Challenge - Fragile Papers


Over on her blog
PaperArtsy,
Leandra has started a new fortnightly challenge
 and the first one is
 'Fragile Papers' 
It was this image on her blog which first inspired me to take part!


I decided to make some post it note holders
using faces I had painted almost a year ago now -
funnily enough I was inspired to paint them via a link
on the PaperArtsy blog and Clare Lloyd.
If you're interested, my original link is here

For this challenge I decided to use three different
types of 'fragile papers'.
The first, has to be my favourite old, really old book of
Charles Dickens - The Old Curiosity Shop

(The other two papers I used were an old street map
and some very thin pages from an old Taxes Act - and with them
I covered the inside covers)

For the covers of one of the post it note holders, I used two
coasters which you may recognise as freebies from a charity
which seem to arrive through our letterbox quite frequently.
It is fortuitous that they are just the right size to hold
a small pad of post it notes. 

 I used the old book pages for the outside covers.


For the inside I used Distress Inks and
for the outside PaperArtsy Fresco Finish Chalk Acrylics
(Eclectica3 Limited Edition)

 I stuck the face onto the cover and then did a bit
of random stamping around it.


For the other one, I just did a bit of splodging with some
Studio Acrylic paint.


I used my Bind-It-All machine to join the covers.
For the one on the left I had to do a patch up job
because I made the mistake of spraying a sealant on
before punching the holes and it got a little bit stuck
in the process, even though I thought I'd waited long
enough for it to dry!


I like the finished look of both of them,
especially because the text of the old book pages
can still be seen!

There is a lot more information and inspiration on
the PaperArtsy blog about the challenge should
you be tempted to take part.

Thanks for looking :)


Sunday 4 January 2015

Rummikub Bag

I've neglected my blog for three months,
and then I make two postings in one day -
think I'll need a lie down after this :)

My sister-in-law asked if I could make a new bag for
her grandson's game of Rummikub.


I decided to recycle some old fabric


There's not a lot left now of my old jeans!
For the lining I used some Laura Ashley fabric which had
previously been covering an ottoman in our bedroom.


I rubber stamped the name of the game on a
piece of Aida fabric
 (the wonky-ness was intentional this time - honest!)


I stitched it onto the front of the bag
with some co-ordinating ribbon.

Once it was made up, this is what the inside looked like


... and the outside


It's rather heavy duty compared to the original bag
and I fear that it won't fit into the game box, but
it should last for a while.

I followed a very clear tutorial on Pintrest for the 
pattern of this drawstring bag which may be found

As always, thanks for looking :)

Back with a Blog!

Back with a blast? - Well, not really, but I'm back with my blog anyway.
Thought I'd better come back and claim it in case someone or something
decided to take it over [insert some spooky sound effects here!]

Here are some of my recent makes - a couple of birthday cards
 
 
These were both made with Julie Nutting's Doll Stamps
from Prima - the one on the left is 'Megan' and on the
right - the doll with no name! 
 I think she may have been one of the early ones - 
the number on the packaging is 910198.
Oh dear, I wonder if Sue will notice how wonky I stuck
the sentiments on!

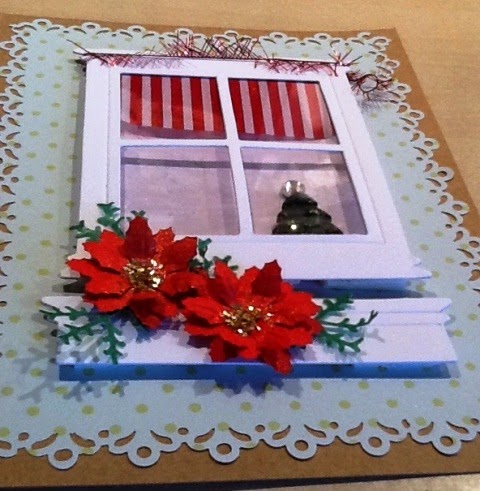
For the Christmas cards I made I used the Sizzix Bigz die
called 'Window and Window Box' by Tim Holtz / Alterations.
 
I enjoyed choosing the fabrics to dress the windows!
 
 
 I made a lot of little poinsettia flowers using a two punch
set - one cuts and the other embosses.

Finally, this card with more of the flowers.


I hope everyone had a lovely Christmas 
and wish you all a Happy and healthy New Year :)