Pages

Wednesday 27 September 2017

Gathering Memories Project

This feels weird - I haven't blogged for a couple of years.  I've still been crafting / making / sewing etc but just haven't been blogging about it all.

However, this seems a good time to resume -
a great cause called the 'Gathering Memories Project' in aid of the Alzheimer's Society.

Here's some links about the project

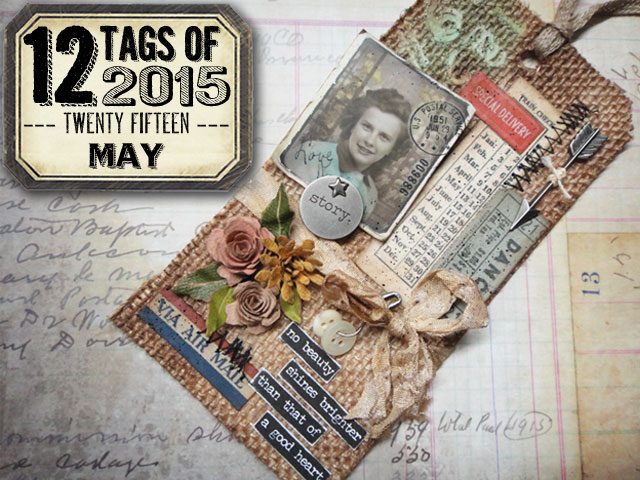
In short, you pay £5 (or more if you wish) and receive the above project kit.
With the kit you then
"create (your) own interpretation of memories through the medium of textiles and mixed media."

The memory I decided to use to create my little piece of fabric art came from these
old photographs.  


The photos were taken on a family holiday in St Ives, Cornwall (UK).
The little girl is me with my baby brother.  I don't know the exact year,
but guess it was about 1967.

Here's what I made based on the sea / landscape.


Here are some step by step photos showing how I made this.

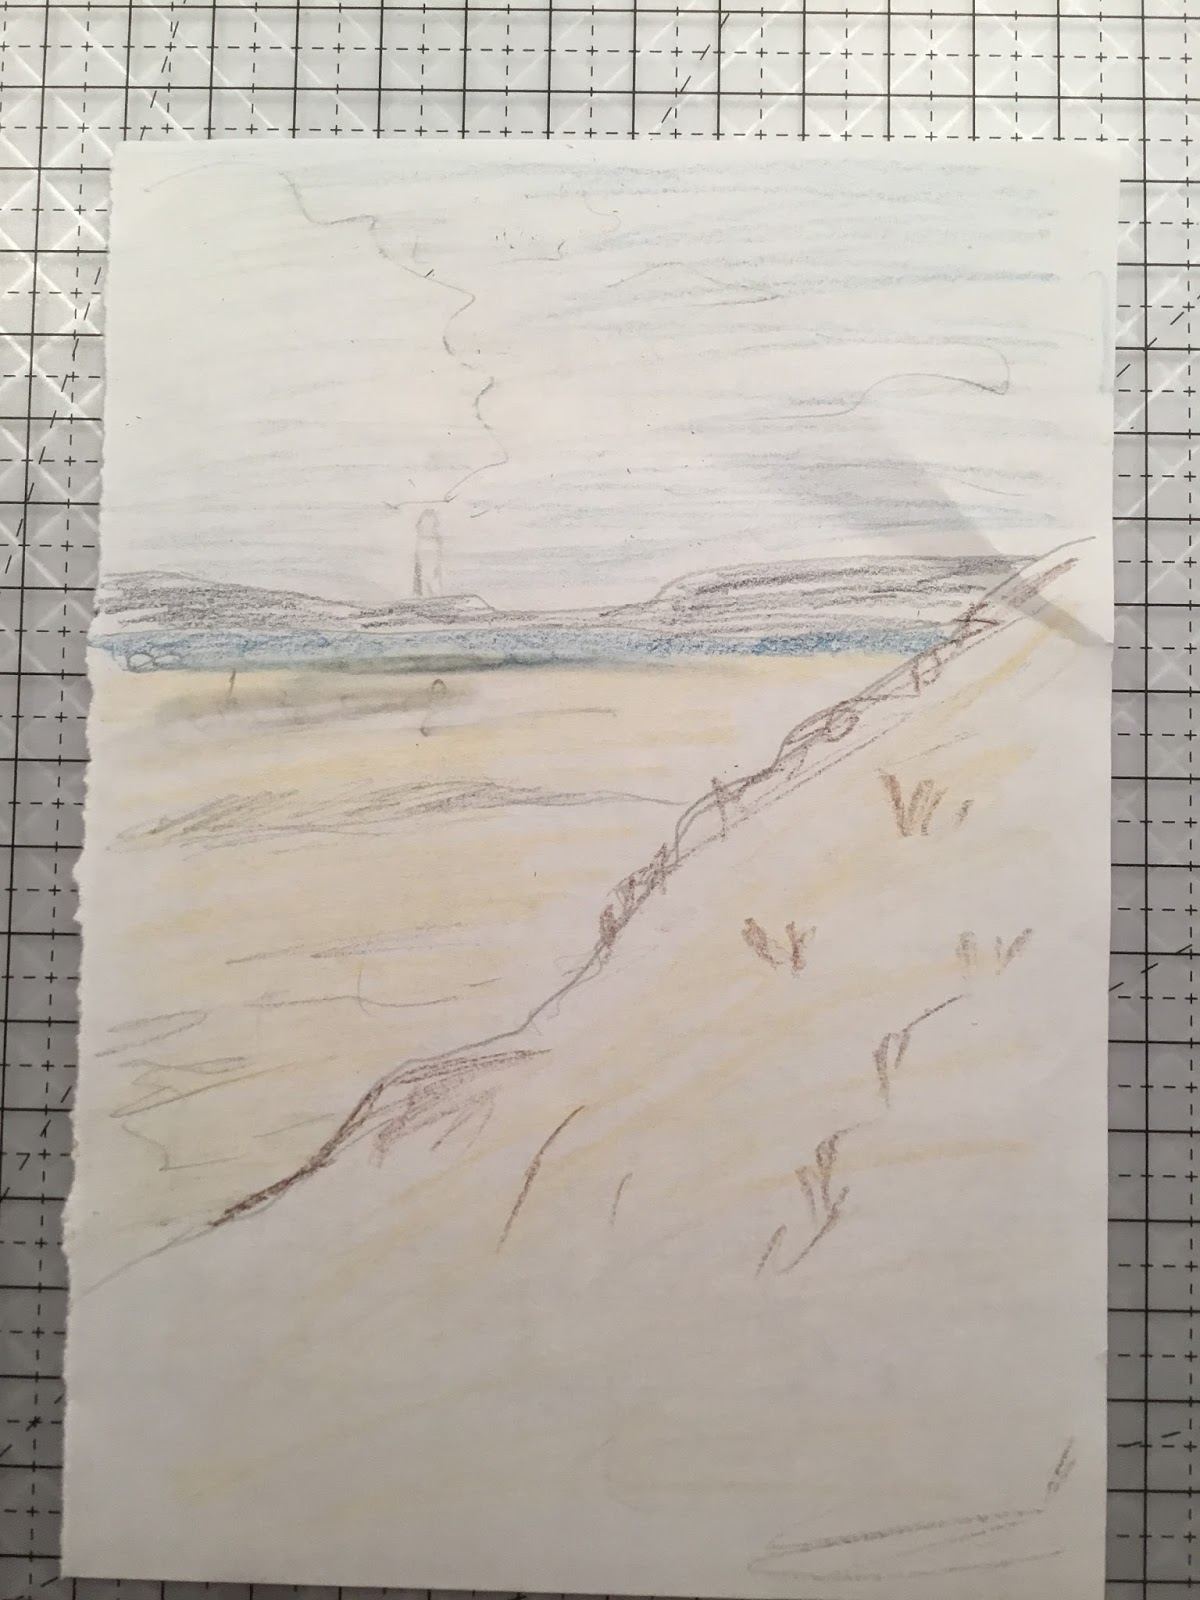
This is a rough sketch of what I wanted the finished piece to look like.


I started adding (machine stitching) the silk ribbon from the kit to represent the sand.

 
Continued adding the ribbon and lace and other fibres to build
up the sand dune.
Also added some blue ribbon for the sea in the distance.


Using embroidery thread (3 strands) I hand stitched the land.
For the sky I used several layers of organza and needled felted
(by hand) some white wool clouds.


I added some beads to represent rocks on the land.
Then finally the grasses - which I hand needled felted on,
but also used a couple of machine stitches too.


.... a couple of close ups


I remember vividly how high the sand dunes were and reaching the top of one,
decided I didn't like it and had to slide my way back down!
There were a lot of clumps of fine grasses in the silky golden soft sand.

A lovely memory.


Thursday 14 May 2015

My Patchwork Pouch


This post follows on from the previous one.
This is the zippered pouch I made for myself.

The patchwork is a little more uniform this time as I used
mainly squares & rectangles of fabrics.


The patterned fabric was from a bag of Cath Kidston scraps.
 I didn't have enough floral pieces to
complete the rectangle so included a couple of 'odd' pieces
- football players and part of a bird -
I put them at the bottom so they wouldn't show on the 
finished pouch.


This is the back of the pouch.


I had another go at some cotton reels - and attempted
some scissors.
 

Another rubber stamped mannequin on some linen
and freehand stitched fabric over the top.

The box corners give it a flat bottom and enable the 
pouch to stay upright.

I lined it with some co-ordinating fabric.

I'm all pouched out now!
Thanks for looking :)

Playing with Patchwork


I've been having a go at some patchwork lately.
Not proper or precise, just piecing together some fabric
in a haphazard way and seeing what develops!

I got inspired to do this originally when I saw
this pin on Pintrest
Freehand machine embroidery
It is from a site called Just Bunting
and has been freehand machine embroidered.
How cute, a little sewing machine made from fabric pieces!

I made one of my own so it could become one
of the pieces in my patchwork.


I rubber stamped a mannequin image onto some linen
and added some fabric for another piece.


I had a go at some cotton reels based on this image
also found on Pintrest

Make do and mend - framed freestyle machine embroidery picture
 This is from Jo Melrose Designs.

I didn't like how my version turned out originally,
but decided it was OK in the end.

So, having assembled and stitched together my
pieces I had two rectangles of fabric


I decided to make them into a little bag
and found a great tutorial for making an

I also found this YouTube video, which although
I didn't follow, found it contained some useful info.

Here's some pictures of the finished pouch


I was really pleased with how it turned out
and decided to give it as birthday gift to a
blogging friend.

I made a card to go with it - I just love those
little fabric sewing machines!!

 
I liked the pouch so much - and chuffed with myself
at having inserted a half decent zip so decided to make
one for myself ..... I'll show that in another blog post.

Thanks for looking :)

Friday 8 May 2015

12 Tags of 2015 - May

12 Tags of 2015 - May | www.timholtz.com 

Making sure this month I get my tag made in time!

Tim's beautiful tag is above.
If you click on the pic it should take you to
his blog where he shows and describes how he made it.

As usual I had to improvise with most of the
products needed to make the tag.

I didn't have the self adhesive burlap, but did
have some on a roll, so machined stitched it onto a tag.

 
 I did have a Tim Stencil - but not the texture paste.
I bought some 'Modelling Paste' from either Lidl or Aldi
a while back and it worked fine.

 
 Next was a case of collecting bits and pieces to 
layer up on the tag.


The picture of the girl is part of an actual old photograph
which I cut down.  I've never 'tinted' a photo before
and really like the effect - with Spun Sugar coloured Distress Marker.


The sentiment was rubber stamped onto tissue
and applied to the tag with gel medium.
(It's a PaperArtsy stamp I seem to remember)
I didn't have the floral die cut set so used some
flowers from my stash.

Here's the finished tag


Thanks for looking :)

Sunday 3 May 2015

Giveaway Winner


The winner of my giveaway is
 Jackie.

Congratulations Jackie - will you please let me
have your address details (via the email button in my sidebar)
and I'll send your little Prim-cess onto you.
 
Thanks to everyone who took part
and for your lovely comments which are of course
always appreciated :)

I shouldn't forget a real Royal Princess who came into
the world yesterday - isn't she beautiful!


Duke and Duchess of Cambridge with their newborn daughterPrincess of Cambridge 
 
I wonder what her name will be?
 
Thanks for looking x