Pages

Tuesday 25 September 2012

Jade Ladder Bracelet


Well, it's not Jade and it's not a ladder, 
but that's what I'm calling this bracelet I made
at this week's jewellery class -
Jade Ladder Braclet.


This was rather time consuming and a bit fiddly,
so I finished it off at home.
It started off with two lengths of chain 
(measuring around the wrist plus 3cm)
The two lengths were attached to a
jump ring and clasp.
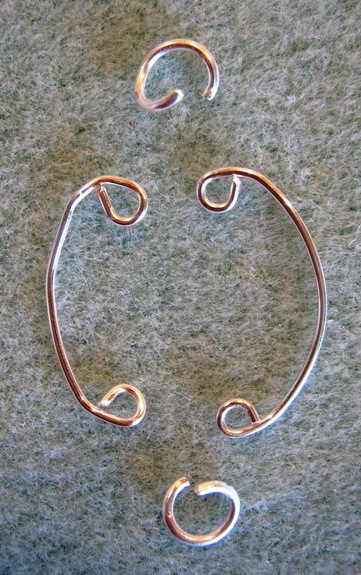
Some wirework was involved - creating a little
coil at the end of some silver wire (16 gauge)
the wire was then threaded through one of the links
of one of the chains, beads added, threaded through
the other chain and another coil made to finished that 'step'
of the 'ladder' off.
As you can see, I found it a little difficult
lining up the two sides of the chain so each step
looks a bit on the wonky side!
When it's on though, it does look ok (I think!)

Here's the finished article.


Practice makes perfect, so I'll keep at it!

Thanks for looking :)


Tuesday 18 September 2012

Jewellery Classes - the good and the bad!


Well, I'm exaggerating about 'the bad', but this
is what I made at last week's jewellery class
and it's my least favourite piece to date.

I don't wear much jewellery at all and this pendant
is something I definitely wouldn't wear.
That doesn't mean to say I don't like it, it's just
not what I'd wear.
On the plus side, I did enjoy making it -
it's a real shell (so I didn't make that - lol),
but I put together the beads on some cotton
and attached it to the shell (which had been pre-drilled
by the tutor) with jump rings.
I also attached the wire to the end of the leather thong
and attached the lobster clasp.

Now onto the good ....


This is what I made at this week's class and I think
it's something I would actually wear.
I didn't make the chain - that was given to us
fully formed (thank goodness!).
We had the choice of making a short necklace or a bracelet,
so I opted for the latter.
We had to prepare all the beads first - by attaching
them to 1.8 wire, forming loops and shapes and 
wire wrapping some of them, 
whichever and however we wanted.
  My shapes are a bit odd, but at least they're
all like it, so that's ok - lol!
All the beads were then attached to the chain -
 I used jump rings for them all although we were 
supposed to have formed the loops and shapes so they
could fit onto the chain without jump rings - oops!!
 
The finished bracelet is quite heavy and I love
the jingly sound of it!

Thanks for looking :)


Sunday 9 September 2012

Glow Girl Glow!

Prima Promo image and logo

Yesterday we were going to a Golden Wedding Anniversary
celebration which didn't start until 4pm and on the way we
had to pass Bluewater - and what should be going on there
at the 'Glow' arena, but a craft show!

Well, it really would have been rude not to pop in
and have a look - don't you agree!

So a couple of hours later out I came with the following goodies!


 Some wooden buttons 
('decorative laser cut embellishments)
from Button-It.


 Craft Pelmet Vilene and some sheets
of 'Tyvek'


Stamps, paints and tissue paper from
and as the show wasn't crowded I watched
a demo by Leandra all by myself -
Usually at AllyPally there is a huge crowd around her
so I was very lucky indeed.

  
 I also stocked up on some glues, ribbons
embossing folders, embellishments and stamps 
from the Portobello Road range by Papermania -
well I had to becase they were reduced and kept
calling me as I walked past - lol!
 Oh, a couple of packs of dried flowers
from the lovely ladies of the

Well, that's my birthday pressies from John sorted out
anyway - now I just need to find the time to play with them!

Tuesday 4 September 2012

A Necklace .... well sort of!


I ventured along to this week's jewellery class alone (and survived!!!)

We made the above necklace - well part of it, I had to finish
it off at home as I run out of time.

I really like the look of it, but you may be able to see from
the photo that the links are not all the same size and some
are a bit on the wonky side too!  Well, I am a novice at all this,
so hopefully in time I'll improve.

The only materials needed were some 1.8 wire and jump rings.
I haven't yet mastered the skill of opening and closing jump rings 
using the tools so consequently have worn my fingernails down quite a bit!

I'm showing below step by step notes of how I made
the necklace, only because in a few days time I'll have forgotten!

We cut 32 pieces of the silver l.8 wire - each piece 
measuring 4cm long (in my case approx 4cm long!)
We then bent the wire around a small bead bottle to
give it the curved shape.


We took five of the pieces are hammered them flat
leaving a little bit at the end to make a loop with
the round nosed pliers.
They were then all threaded onto one jump ring.
This is the pendant for the necklace.


With the remaining 4cm long pieces of curved wire,
each end had to be looped
 (again with the long nosed pliers)


 These two pieces were then joined together with jump rings
at each end.

 All that needed doing then was joining each link
together with more jump rings and attaching the pendant
in the middle.

We made a 'S' shaped hook for the opening which you
may be able to see at the top of the photo.


All that I need to need to do now is to try and pick
the necklace up from my desk and hope it doesn't fall apart!

Thanks for looking :)

Saturday 1 September 2012

Craft for the boys - but the girls helped too!

 
Last weekend me and hubby helped Aaron, my nephew make a 
play surface / layout for him to use with his toy soliders / warriors.
I'm not sure what they are exactly, but they're called Warhammers
and everything associated with them is so expensive, so we
decided to have a go at making something ourselves. 

My hubby provided the base board, he'd made several years
ago for a railway layout, but which he'd never used.


The first step was to shape some polystyrene into hillside shapes.

 
The hills then needed to be glued into place -
expertly done by big sister Chloe.


Then the best bit - covering the whole lot with Plaster Cloth.


Once finished this is what it looked like.

 
Once dry, the entire board was painted with some old emulsion
paint from our garage.


The following day, the finishing touches were added.
PVA glue and sprinkles of sand

 
 Then scenic scatter materials
(again from hubby's model railway stash)


It looks a little unfinished to me but Aaron liked
the sand-scape look of it.


Here's a closer shot


Aaron's now happy to have somewhere to fight his battles
(or whatever the Warhammers do!)
.... it didn't cost a fortune and was enjoyable for us to all help make.
Result all around!