Pages

Showing posts with label Tim Holtz. Show all posts

Monday, 9 February 2015

12 Tags of 2015 - February

12 Tags of 2015 - February | www.timholtz.com 

A click on the photo above (copied from Tim Holtz blog)
should take you to the post describing how he made it.
He said
"the month of february is all about about the things we love, so what better theme for the tag than my simple love of making things. check out this easy way to layer your favorite ephemera to create this patchwork inspired collage – have fun…t!m"

 I decided to make my tag based on my love of
vintage sewing stuff.

 
 My ephemera includes pieces from old 
dressmaking patterns, a button card and
an embroidery skein label.


  I didn't have the 'glue n seal' so instead
used Liquitex Matte Medium and Paper Mod Podge.

 
Instead of a felt heart and metal heart and arrow,
I used an old leather tag and a metal scissors charm. 
Instead of metal corners at the bottom, I used
some staples from my Tiny Attacher to
look like stitches.

 
 I don't think my black lines edging each piece of
ephemera work very well even though I did use a
Distress Marker.  This may have been due to not
using the 'Glue n Seal' product?

I still like the finished tag anyway :)

Thank you for looking.


Wednesday, 21 January 2015

12 Tags of 2015 - January

12 tags of 2015 - January | www.timholtz.com 

I shall start the year off with good intentions and join
in once again with Tim Holtz' 12 Tags of 2015.
Last year I got as far as September - let's see if I can
beat that this year!

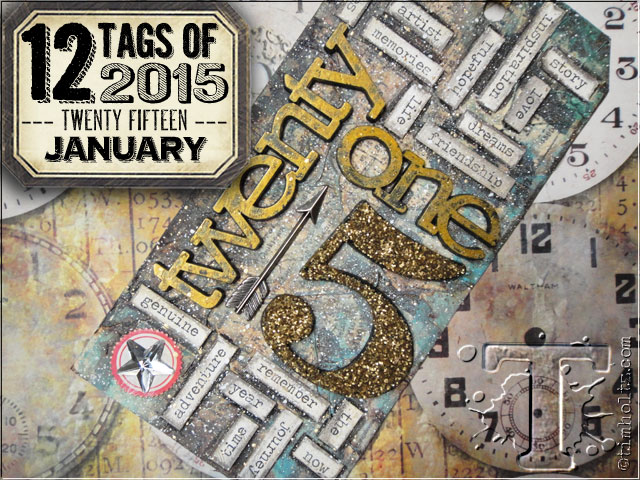
  A click on the above photo (copied from Tim Holtz blog)
should take you to the post describing how his January tag was made.

It goes without saying (but I'll say it anyway!), 
that I didn't have all the products used in the making of Tim's tag.

Here's some of what I did use.


 ... and here's my finished tag


The face is one I painted a while back and as it was 
on my desk - and the colours were similar to what I
used for the tag, I decided to include it.

The quote is one I found on Pintrest, just printed
onto copy paper and shadowed with a
Black Soot Distress Marker.


 I like that quote!

Thanks for looking & I wonder what Tim has in store
for next month's tag!


Friday, 27 June 2014

Tim Holtz: 12 Tags of 2014 - June

DSC00308 3.37.51 PM 
 Tim's tag for June is above -
If you want to see how he made it,
click on the picture to go to his blog.
 
..... and here's my version


 The idea this month was to create a look of
blended watercolour with a stencil and
distress inks.


 The background was first made on watercolour paper
then stuck onto a manilla tag.


I didn't have the stamp set Tim used but
found this butterfly one in my stash - 
from PaperArtsy (Ancestors - Plate 1).
(The words are from one of Tim's
Stampers Anonymous)


The ribbon for the bow was supposed to be
multi coloured as I did use all four of the
distress inks but the Peeled Paint green
colour seems to have won the day!

I used a couple of pink buttons instead of the
tiny gears and spinner Tim used.

Only a couple days wait until next
month's Tim tag, hopefully, I won't leave that one as late.

Thanks for looking :)

Wednesday, 14 May 2014

Tim Holtz: 12 Tags of 2014 - May

DSC09557 

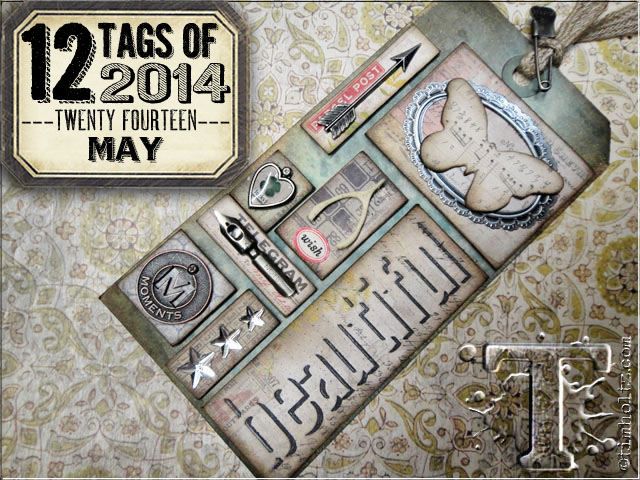
Tim's tag for May is above -
click on the picture to go to his blog and
see in detail how he did it.
 
2014tags

Here's the one I made

 
The idea this month was to use trinkets and embellishments
and mount them onto a series of little tiles.
In Tim's own words this was to be a
"“creative composition” assignment -
a simple process to layer and incorporate 
an eclectic mix of elements into an artful tiled tag." 

This is what my background looked like at first.


I laid out the bits and pieces I was going to use


(I changed my mind about the buttons and used
a pen nib instead)

I don't have a great many different embellishments
but was pleased with those I managed to find.

 
I like the little blue cameo which I've had for ages.
Similarly, the rusty heart.


I cracked open the packet of idea-ology fragments
and stuck a vintage image below two.


I enjoyed creating the 'wonderful' tile with the
Sizzix Alterations ShadowPress Debossing folder.
(from the 'Authentic Set').

Each of the mini tiles was covered using paper from
Tim Holtz' idea-ology paper stash (Vintage Shabby).


Not perfect, but it's my kind of 'wonderful'!

Thanks for looking :)

Friday, 11 April 2014

Tim Holtz: 12 Tags of 2014 - April

apriltag 

Tim's tag for April is above -
click on the picture to go to his blog and
see in detail how he did it.
 
2014tags

Here's the tag I created
- closely based on Tim's one this month.


The trellis effect background is a Sizzix / Alterations
Bigz die called 'Lattice' - I didn't have the exact one
Tim used, but this was close enough.
I didn't have any Distress Paint so instead used what
I had but it didn't produce the mottled effect when
splashed with water - also I would have liked a 
stronger colour to stand out more -
any more complaints?  - just saying!

 
I actually really love this die cut - lattice
and am sure I'll be using it again and again


I did have the Sizzix / Alterations Bigz die
needed to make the dried tea roses
'Tattered Pinecone'
I found the roses quite fiddly to do, but
kept with it and I think they have turned out nicely.


This is one of my favourite tags so far
and I think I'll mount it onto a card for
my Mum's birthday later this month.


Wonder what'll be in store for us next month...!

Thanks for looking :)

Thursday, 30 January 2014

Tim Holtz: 12 Tags of 2014 - January


JANTAG

I've been thinking of playing along with Tim Holtz
12 tags of 2014 and have finally got my 
act together - just in the nick of time for January.

If you click on the picture above it should
take you to Tim Holtz blog where you can see
in detail exactly how Tim made his tag pictured above.

Of course, I didn't have all of the supplies he used,
but I am pleased with how my tag turned out.

 Originality was never my strong point - and my tag
 is based very closely on Tims.

I didn't have the pocket watch die so made my own
and I used a different embossing folder.


 So happy with this!


  I mounted the tag on a card, creating a simple
background based on the tag.


That's hubby's birthday card sorted.
I'd better put it somewhere safe though as his
birthday isn't until October! 

Looking forward to seeing what Tim comes up with
for February now!

Thanks for looking :) 


Thursday, 16 January 2014

The Bag Lady!


Inspired by a show on Create and Craft TV
last week I got my sewing machine out -
not something I do very often!


This is where I sew.
It's the other end of my craft room.

The lady who inspired me on the tele was

 She was selling her kits for small
bags/fabric folders and demonstrated
how easy it was to make one.

I remembered I'd bought one of her books
a while back and sure enough in it 
was the exact pattern for her bags.


They really were very easy to make, although
mine are far from perfect.


This is the first one I made and I think it's the best one.
The ric rac is very wide so shows up much more than
on the other bags where I used narrower ric rac.
I used Tim Holtz fabric for both the main and lining fabric,
as it was only 10 x 10" the finished bag is only
8" wide by 31/2" deep - so could be a pencil or
cosmetic case.
 
I made another again with Tim Holtz fabric.
 

I like the wooden buttons especially on this
fabric with the wooden ruler design on.
(The buttons came from a firm called

I then raided my fabric stash and made one
slightly larger.

 
 Made up, this one measures 10" wide by 6" deep.
(I've yet to add a decorative button as I couldn't
find a suitable one in my button box)
I added a strap to the side - making it a 'wristlet'.
I think this will make a good passport holder
which I'll definitely use.

Onwards and upwards - 

  
This is a similar size to the previous one,
just a bit deeper.  This is a cute one - not
sure what I'll use it for, or who I'll give it to yet.

Finally, I made a couple of gadget folders -
 IPad size.

 
Again, this is from my fabric stash, I wouldn't
necessarily have chosen this particular lining
fabric if I'd had more to chose from.


This could double up as a little cushion or pillow - lol.
I used a layer of wadding which turned out to
be far too thick - at least the IPad will be safe.

For the next one I used felt instead of wadding
which is much better (not such a comfortable
cushion though!)


Now, what else can I sew while the machine's out!!
 
Thanks for looking :)