Pages

Showing posts with label distress ink. Show all posts

Wednesday, 21 January 2015

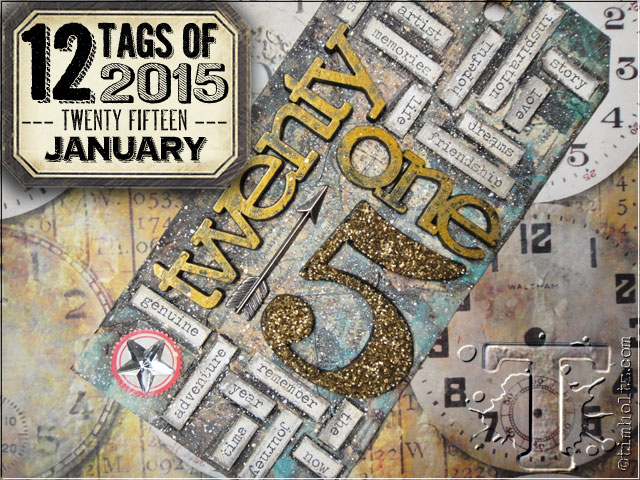
12 Tags of 2015 - January

12 tags of 2015 - January | www.timholtz.com 

I shall start the year off with good intentions and join
in once again with Tim Holtz' 12 Tags of 2015.
Last year I got as far as September - let's see if I can
beat that this year!

  A click on the above photo (copied from Tim Holtz blog)
should take you to the post describing how his January tag was made.

It goes without saying (but I'll say it anyway!), 
that I didn't have all the products used in the making of Tim's tag.

Here's some of what I did use.


 ... and here's my finished tag


The face is one I painted a while back and as it was 
on my desk - and the colours were similar to what I
used for the tag, I decided to include it.

The quote is one I found on Pintrest, just printed
onto copy paper and shadowed with a
Black Soot Distress Marker.


 I like that quote!

Thanks for looking & I wonder what Tim has in store
for next month's tag!


Friday, 27 June 2014

Tim Holtz: 12 Tags of 2014 - June

DSC00308 3.37.51 PM 
 Tim's tag for June is above -
If you want to see how he made it,
click on the picture to go to his blog.
 
..... and here's my version


 The idea this month was to create a look of
blended watercolour with a stencil and
distress inks.


 The background was first made on watercolour paper
then stuck onto a manilla tag.


I didn't have the stamp set Tim used but
found this butterfly one in my stash - 
from PaperArtsy (Ancestors - Plate 1).
(The words are from one of Tim's
Stampers Anonymous)


The ribbon for the bow was supposed to be
multi coloured as I did use all four of the
distress inks but the Peeled Paint green
colour seems to have won the day!

I used a couple of pink buttons instead of the
tiny gears and spinner Tim used.

Only a couple days wait until next
month's Tim tag, hopefully, I won't leave that one as late.

Thanks for looking :)

Thursday, 30 January 2014

Tim Holtz: 12 Tags of 2014 - January


JANTAG

I've been thinking of playing along with Tim Holtz
12 tags of 2014 and have finally got my 
act together - just in the nick of time for January.

If you click on the picture above it should
take you to Tim Holtz blog where you can see
in detail exactly how Tim made his tag pictured above.

Of course, I didn't have all of the supplies he used,
but I am pleased with how my tag turned out.

 Originality was never my strong point - and my tag
 is based very closely on Tims.

I didn't have the pocket watch die so made my own
and I used a different embossing folder.


 So happy with this!


  I mounted the tag on a card, creating a simple
background based on the tag.


That's hubby's birthday card sorted.
I'd better put it somewhere safe though as his
birthday isn't until October! 

Looking forward to seeing what Tim comes up with
for February now!

Thanks for looking :) 


Tuesday, 14 December 2010

12 Tags of Christmas - Day 4


I'm only ten days late with this tag - not too bad!

I made this tag following the techniques described by Tim Holtz on his blog. 
This tag was all about embellishments and in particular using a 'facet'.  As I didn't have any of those I used a vintage glass droplet from an old chandelier.


Tim's technique called for rubber stamping on the back of a facet, but the drop I used only had a small flat area in the centre so I was a bit restricted.

I'm pleased with the overall effect though, it was fun using lots of bling and it's in my favourite colour too.

Only 8 more to do now!

Friday, 10 October 2008

Another ATC Swap with a difference!


Sian is hosting a couple of unusual swaps at the moment which I couldn't resist having a play with.

This one is a 'See-Through' swap. The only rule being that at least one part of the ATC must either be transparent or translucent. Well, this is all new to me - never done anything like that before! So, I kept it fairly straight-forward and for each one used 2 pieces of card with a piece of acetate sandwiched between them.

For the first one I die cut out a little man in the card and put some old text in the middle. I also stamped a crown on some text and stuck that on his head. Lastly, I rubber stamped a face on the acetate (oh, and drew in his lttle gold tie).

The middle one I cut out a jigsaw shape (bit wonky as I did it free hand!) and alcohol inked the acetate. The background is coloured with some distress inks, and finally a real jigsaw piece was stuck over the top.

The last one I punched some squares out of the card and coloured with distress inks. The top piece of card I rubber stamped some swirls on using Versamark ink and then brushed some Cosmic Shimmer powder over the top. This gives a lovely effect. I alcohol inked the acetate again, and rubber stamped a face onto it.

I also did another two but haven't included them here. I'm looking forward to receiving some swaps back to see what other people have done.