Pages

Saturday, 21 August 2010

Blogging Holiday!


We're all going on a .... blogging holiday .... no more crafting for a week or two ...

We're going where ... the sun shines brightly

... we're going where the sea is blue ...

That's quite enough of my singing - LOL

I'll miss you all, but will see you soon

Happy Crafting crafters ....

and a BIG thank you to everyone who looks in and leaves me lovely comments I do so appreciate it!

Sunday, 15 August 2010

Bags of Fun!


I had my sewing machine out this weekend and made these two bags which I am quite happy with (for a change!)

The pink and green one is a net book bag, quite small measuring approximately 10 x 11 inches (excluding the handles).  I followed the tutorial at My Backyard Eden which is very clear and easy to follow and can be adapted to any size of bag.


Between the main fabric and lining I sandwiched quite a thick layer of wadding - too thick really, but at least it will protect the contents of the bag. It's very soft and plump, like a pillow.


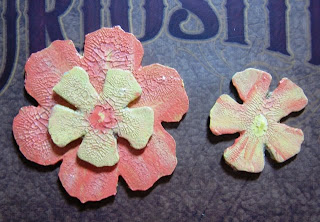
I die cut some of Tim Holtz' Alterations 'tattered florals' flowers from the main fabric and felt and sewed them together with buttons.  


The other bag I made following one of the patterns in a book called 'Sew What! Bags' by Lexie Barnes.  Again the instructions are very clear and precise and there are not lots of measurements involved - nice and easy, that's the way I like it!


I love this cotton fabric with beach huts on.  I've had it quite a while and couldn't decide what to do with it, but eventually settled for this quite simple tote bag.  It's another smallish one and measures approximately the same as the other bag.

The bag is reversible too.  The other fabric also cotton I've had for ages and I think the colour compliments the beach huts quite well.


I like the beach huts side much more though and added a couple of die cut flowers to that side under the handles with some co-ordinating buttons.


I think I'll be making some more of these soon!

Thanks for looking!

Thursday, 12 August 2010

Who Loves Ribbons?


I do, do you too?

A couple of days ago I received these spotty ribbons in the post from Crafty Ribbons for taking part in their Ribbon Challenge No. 17 'Organza Swiss Dots'.  As I was one of the first 15 people to email them I was sent a bundle of their exclusive ribbons and in return they asked that I create and send them two items where their ribbon had been used. 

I hadn't made a paper doll for a while and thought this was a good excuse to do another and dress her completely in the ribbons!  Her name is Miss Dotty Swiss and she is showing you all the ribbons above!


Of course she had to have a couple in her hair!


The ribbon is narrow - only 10mm wide so for the bodice I glued strips onto a bodice shape piece of card (with sticky dots - how appropriate!).  For the skirt I cut small strips and glued them under the bodice.  Musn't forget her spotty tights either!  Her legs were just about slim enough for one strip of the ribbon. I glued the ribbon onto the legs with Anita's 3-D glue.

For the other piece I created a little wall hanging, details of which may be found in my previous post.  I used the ribbon on the flower pots and for the hanger too.

Here are both pieces together


If you haven't been over to Crafty Ribbons website before, it's well worth a visit as they have all sorts of ribbons at very reasonable prices - and there's a sale on at the moment.  Also, every week they have a 'Friday Freebie' just for leaving them a comment - well, it seems rude not to!

Thanks Crafty Ribbons and I hope you'll like my two items which will be on their way to you tomorrow.

Tuesday, 10 August 2010

Compendium of Curiosities - Challenge No. 9 - Distress Crackle


The challenge this week set by Linda over on her blog Studio L3 was to create something working from Tim Holtz' book Compendium of Curiosities page 42  'Distress Crackle'. 

Isn't it great to see the Distress crackle paint do just that before your very eyes - crackle that is.

I used Shabby Shutters Distress crackle paint and Tea Dye Distress ink to colour two die cut Grungeboard flowerpots.


I would have loved to have used a terracotta kind of colour, but had to use what I had (kind of appropriate for the quote!)

For the die cut Grungboard flowers I used Studio acrylic paint as a base then the Distress Crackle Paint (clear rock candy) over the top.  I wasn't as pleased with the flowers as I was with the pots - but having just read the book again - I see that I missed out the final step - doh!!  Oh well, I'll know for next time.


I mounted the flowers in pots onto a piece of mountboard (cut with one of Tim Holtz alterations Sizzix dies) and coloured the background with a mixture of various distress inks and a touch of cream acrylic paint.

I added some ribbons for the finishing touch (and there'll be more about those ribbons in my next post) and that's it, a little wall hanging, duly distressed and crackled - with a lovely uplifting quote.

Happiness is the art of making a bouquet
of those flowers
within reach

Thanks for looking!

'Aloha' Dancing Girl .... just danced her way to me!


How lucky can one girl get!  I had an email this morning from Lilla in Hawaii saying I had won her giveaway - a beautiful lace collaged book and cover.  It's simply divine and you can see it on her blog here, I can't wait to receive it!.

Lilla's email was titled 'aloha' and she ends it with the same greeting too.  Why am I telling you this - because I received something in the post this morning which was called 'Aloha' - Dancing Girl.  What a co-incidence (maybe I should buy an extra lottery ticket this week!).

The Dancing Girl is a prize I won on the blog 'It's an Alien Life' from the multi talented Mrs A who set a little competition. 

Mrs A said as soon as she saw this in her book (Japanese hand made gifts I think it is) she thought of the little dresses I make every month in the Dress Up challenge and had to make it for me.  That is so thoughtful and kind!

Mrs A said the 'pocket is designed to take a special piece of jewellry or a little bottle of cologne'  ....  wonder what I'll put in it!


The hanger is made up of some lovely glass beads, and there are more stitched onto the ruffle on the silk bodice. 


Everything is hand stitched, so neat and exquisite and the fabric is beautiful!


The back is decorated too


Inside, the pocket is lined with the softest felt and the skirt petals are also lined with felt - all hand stitched, such patience she must have.

Here's one more photo of the side view


You may have guessed that I am just a little bit pleased with my prize!

Thank you again Mrs A - you're the best!

Friday, 6 August 2010

Tutorial for an Emery Board Holder


EDITED 4th November 2012
I have modified this template slightly
new post is HERE

EDITED 5th March 2014
I've made some using a faux leather
technique - much stronger
new post is HERE
I made these little holders from card to hold a few emery boards.  They measure approximately 5" x 2" so are ideal to keep in your handbag or on your work desk for when you need to do a quick repair to your finger nail.

I used a textured white core cardstock, but any good quality card would do.


I've just realised that I've missed a couple of measurements off the template - the width is 2" (but it extends to 3" for the bottom part as shown).  The two side flaps at the bottom measure 1/2" wide each (so the flaps are three and half inch long by a half inch wide).  Sorry about that, but please don't hesitate to ask me if anything is still unclear.

To make the front a little more interesting, I textured it with my Big Shot die cutting machine using a Cuttlebug embossing folder.


I did a bit of rubber stamping inside and out.


Using an emery board (they're not only for nails!) I rubbed over the textured part to give a distressed look.


I sewed on two co-ordinating buttons - best to do this now before sticking the holder together!


Leave a tail of cotton on the top flap as this will be wound around the bottom button to become the fastener.

Using a glue stick, apply glue to the front of the two small flaps.


Stick the flaps to the underneath section and hold in place for a few minutes with some clothes pegs to ensure good adhesion.


Once firmly stuck down, insert a few emery boards into the pocket and you're good to go!


They are quick and easy to make and are nice little gifts to give to your family and friends - they would also make good Christmas stocking fillers.

Thanks for looking and if you do make any yourself, I'd love to see them!

Thursday, 5 August 2010

Dress Up - August


How time flies - it's August already, that means dress number eight to add to my collection for the Dress Up challenge being hosted by Margaret on her blog Alice and Camilla where all participants create one dress for every month of the year.

As I'm going on holiday to Cyprus later this month my dress is based loosely on their traditional national dress. 


I cut the basic dress template from white card (extending the arms to make long sleeves) and painted with some dark red acrylic.


I cut an apron shape from some broderie anglaise fabric and did a bit of machine stitching in red and black around it and stitched it onto the card dress.  I rubber stamped some swirls in red ink along the bottom to give the look of embroidery.  It's actually a stamp from a Christmas set - the poinsettia flower may have given it away!


I did much the same at the top of the dress - not the best rubber stamping in the world, but I think it gives the effect of embroidery (well it does from a distance - if you half close your eyes - and have a good imagination - LOL).


Here's all the dresses together in their own little wardrobe - I think I'll just about be able to fit another four in!

Thanks for looking!

Cotton Reel Art Doll


A new swap challenge has just been set by Viv on my favourite Flickr group Art 'n' Soul.  It is to create an art doll who stands in a cotton reel and based on an article by Sue Roddis in the UK Craft Stamper magazine (March 2010 issue, page50).

The doll I created is quite large - measuring from top of her head to bottom of cotton reel a whopping 11 inches high. 

The body is constructed of strips of folded card (I used strips 2cm wide - that's why she's so big!).  Once all the strips were attached together, I cut out the body shape.  The wings are cut from one piece of card.

Here's what I used to colour the body and wings


For the body, I painted gold acrylic over the whole lot, once dry, I went over with purple Viva precious metal paint, but swiped some off with a baby wipe.  I like how it almost looks like wood.


I gave the body a coat to wear - by adhering pieces of old dressmaking pattern to each side with gel medium.  She had to have a belt around her slender waist too - made with wire and some bugle beads (I think that's what they're called!) and an old button buckle.

Her wings were coloured with distress ink and then over stamped with text.


For her head I used one of those sample chips for kitchen work tops you get at DIY stores (Wickes in this case - Venice Granite!)  The colour of it looked fine as it was and I just rubber stamped a lady's head onto it (from Crafty Individuals CI-238).  I used Versafine archival ink and although it's supposed to be 'instant dry pigment ink' - it didn't want to dry at all!  Eventually after using the heat gun and several blots, I took a chance a sprayed it with crystal clear acrylic coating - and it didn't smudge - oh what joy - LOL!


I drew the heart onto card, cut it out, painted with Viva Ferro (metal effect paint) in Gold Iron colour, edged it with gold pen and sprinkled a few glitzy bits in while it was still wet.

I don't go to posh coffee shops so didn't have a coffee stirrer, but found a piece of dowling I could use as the backbone instead.  I rubber stamped some text onto it and attached it to the back with E6000 adhesive.


Once everything was dry, the doll was placed in the centre of an old cotton reel.


My doll has a vintage look about her, but the one Viv has made is much more quirky and fun - and you can see it on her blog.  I can't wait to see what other people make now - and which one I'll get in return, but I'm going to have to as the challenge doesn't end until the end of the month.

Monday, 2 August 2010

Compendium of Curiosities - Challenge No. 8 - Inking Grunge


Are you a grungy inker?  Do you like inking grunge?  If so hop over to the lovely Linda's blog Studio L3 where you will find details of this week's challenge working from Tim Holtz' book 'Compendium of Curiosities' - page 39 to be precise.  This week Linda has chosen 'Inking Grunge' and it's one of Tim's basic techniques. 

I used Grunge Paper and Sizzix tag and flower die cut shapes. Although it wasn't part of the technique, I also embossed the background of the tag.


I used quite a few different colours of Distress Ink even though from the finished tag it looks like I only used about three!  It's great how all the Distress Inks blend so well together.


I finished the tag with a couple of buttons and a piece of sari ribbon which just happened to co-ordinate beautifully with the colours I used.

Thanks for stopping by and taking a look - I must now go and wash the all grungy ink off my fingers!