
If you've been reading my blog for a while you may remember
my original post for a
Tutorial for an Emery Board Holder.
Since then, I've slighty modified the template
making it even more simple!

For this one you need no glue as it's a stitched holder.
I'll show step by step details how I made the first holder in
the photograph at the top of this post.

I used a pretty K & Co scrapbook paper and cut
a strip measuring 5cm wide by 28cm long
(that's 2" wide by 11" long).
I folded it twice as shown.

I overlocked the bottom of the strip -
this is not essential, but I think gives it a little
more stability.

I rubber stamped some images on the reverse side
of the paper - just the top half as this is the only
part that will show once the holder's finished.


Then I stitched some pretty lace around three sides
of the paper strip (leaving out the bottom side).
I stitched the two buttons on now - for placement
see the template.
Fold the bottom up toward the top as shown and machine stitch the two
sides together, making a pocket.


Fold the top over
and secure closed by
using the buttons -
leave a tail of thread
on the top button which
can be wound around
the bottom button.

Tuck a few emery boards into the pocket
and it's ready to be given as a little gift!
Here's a few others I made too

Again, these were just strips of scrapbook paper.


For this patriotic one, I used
self adhesive card (denim
look) with a serviette / napkin
stuck to the reverse.
Finally, I made a few funky ones.
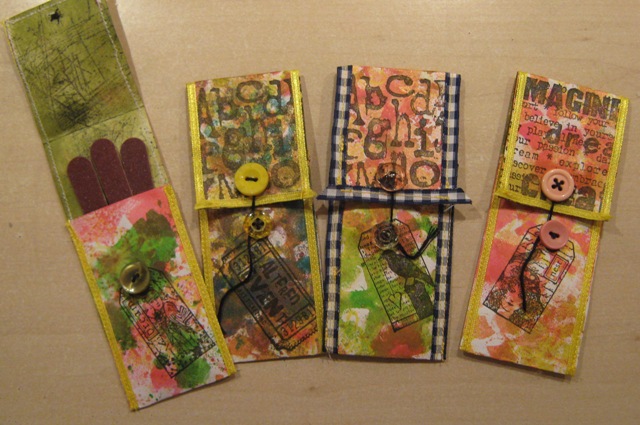
These were strips of a lightly patterned scrapbook paper
which I altered by spraying inks through various stencils,
then did some rubber stamping.
I used some thin ribbon instead of lace.
So quick and easy to make and the possibilites
are endless!
EDITED: 5th March 2014
Here are a couple made out of faux leather,
they are lined with fabric.
My blog post showing how the faux leather
is achieved is HERE.

EDITED: 5th March 2014
Here are a couple made out of faux leather,
they are lined with fabric.
My blog post showing how the faux leather
is achieved is HERE.
~~~~~~~~~~~~~~~
The reason I thought of this new template was because the holder
I made originally, and have kept in my handbag has over time become
a little battered and I thought by using lace on the edges
would make it a bit stronger.
This revised template is different and more simple as it no longer
has the flaps at the bottom which needed to be glued - as shown below.
 | ||||||||||||||||||||||||||
| The original template - with flaps! |
machine stitched instead of glued ... but this new template
is easier to cut out - and I like easy!!!
Thanks for looking and if you make a holder
please let me know as I'd love to see your take on it.


