Pages

Showing posts with label clay face. Show all posts

Friday, 23 January 2015

PaperArtsy Blog Challenge No. 2: Shiny Stuff


I'm joining in again with PaperArtsy's next challenge
"Shiny Stuff".
Here's what Leandra says on her blog
"it's time to get in touch with your inner magpie! We are exploring metals, mica, beads, wire, jewellery, paint effects, Treasure Gold, in other words, all things shiny, rusty or metallic."

All the details may be found here
along with a YouTube video from Leandra which is what
actually inspired me to join in.

I made a paper sewing fairy called Phoebe (that name
apparently means bright, radiant and shining).

I'll show below with photos and not too many words how I made her.

 
 I used a stamp from Character Constructions
and some shiny plumber's tape which I roughed up a bit.


 I stamped onto card painted with 
Fresco Finish 'Sage' colour and stamped
the bodice part again onto the silver tape and layered it up.
The face is moulded from air dry clay.

 
I made the wings and bobbin feet with more of the silver tape
 stuck onto card and embossed with my Big Shot machine.
I coloured them randomly with a mixture of Viva Precious Metal Colour
and Alcohol Inks.  


 She's looking shiny!  
Next I added the arms with silver brads
and machine stitched the wings on.


With some 0.6 gauge silver coloured jewellery wire, I made
a cage to replicate the bottom of the dress form.

 
 Attached the face and wool hair with E6000 adhesive
and a wire hanging

(a hairbrush wouldn't go amiss!)
   

 Not very shiny at the back, but it's always good (I think) to
see how things are put together.

This current challenge runs for another 15 days so there's
plenty of time to get involved.

Thanks for looking :)

Wednesday, 8 January 2014

Hello Dolly!


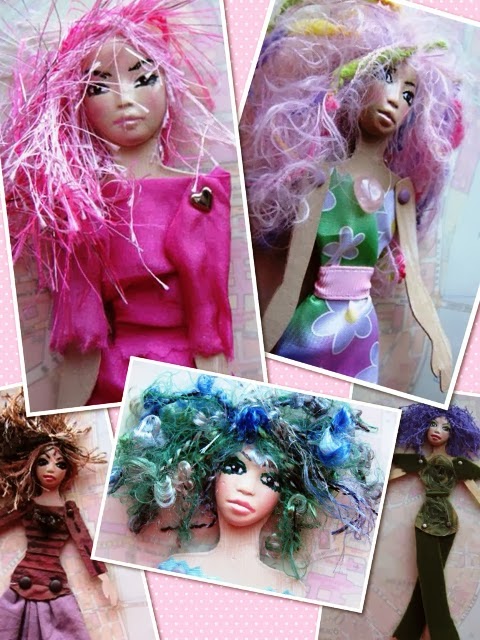
I've made another ten dolls for my Etsy shop

This is the 'Genuine Gemstone Collection'
as each doll is wearing a tiny gem of some sort.
Rosie above for example, is wearing a
Rose Quartz around her neck.

Here's a couple of montages
showing a little snapshot of each doll.

 
 I made the outfits with their particular
gemstone in mind.


Hope you like them and
thanks for looking :) 

Saturday, 23 January 2010

Another Garden Goddess


This one is called 'Rose' and she was made much the same as 'Fern' (in previous post below) except she isn't completely covered in Decopatch paper - her neck and arms are painted in a flesh tone and she is wearing a lace shawl and some sparkly jewellery.


I love the voluptuous shape of this template - and must say it pretty much mirrors my own body shape ................ except I have a few layers of fat on top!

Thursday, 3 December 2009

Girl With A Heart - Paper Doll


This one is a bit different from my usual dolls as I've made her clothes (the sleeves and the skirt) with old book text coloured, then rubber stamped with ink.  I thought the book text was applicable as she's gone to Cindy to wish her a happy birthday and Cindy does like her books methinks!  The wings are a sandwich of acetate and tissue paper made in the same way as I did some Christmas baubles - well actually I made them from the leftovers of the baubles - waste not, want not - and they sort of determined the whole colour scheme.


The heart she is holding is made from metal and is left over from some Christmas ATCs I made recently - oh no, I don't throw anything away!

Anyway, I know that Cindy now has the doll so here she is!

I'd just like to take the opportunity of thanking those of you who leave some lovely comments here (and on Flickr) on my little creations - it means so much!  Thank you!!
 

Thursday, 1 October 2009

Miss Halloween 2009


This month's theme on the Art Raffle is 'Black and Orange' (although it doesn't necessarily have to be Halloween related).

As my creative brain doesn't stretch very far I decided to make ... yes, another paper doll!  She turned out to be something of an exhibitionist with her tight bright orange bodice, pumpkin button bra and black lacy tutu with matching cloak.

Her hair and bodice are Plastraw (like raffia but stronger), her crown is a glittered up plastic embellishment and her stripey socks are coloured in with Marvy LePlume markers.


She looks like a winner to me - so I've crowned her 'Miss Halloween 2009' ........ what's that you say .... 'Smashing Pumpkins' ?   No, I've never been into their music ..... sorry, I couldn't resist adding that!

Wednesday, 16 September 2009

Any excuse to make another paper doll!


Oh yes, and I just had to make one for my niece's forthcoming birthday card. The doll is attached to the card by the shoulder brads so can be detached for playing with! She is complete with her own little shoulder bag too.

Monday, 15 June 2009

Clay Faces - how I do mine.


I've had a bit of trouble lately with painting my little clay faces so decided I would blog about them as much to help me (as a memory aid) as for anyone else who may be interested.

My last few attempts have failed at the last step - when I sprayed a little finishing gloss on them everything smudged which is so disappointing. I have been using Sharpie pens for the detail and it seems the ink in those pens reacted adversely with the finishing gloss.

So having had a little play around this is a Step by step guide and seems to work fine:

1. Paint the whole face with skin coloured acrylic paint and let dry
2. Apply chalk blusher to forehead, cheeks and chin
3. Outline the eyes - using a watercolour pencil
4. Paint the whole of the inside of the eyes with white acrylic and let dry
5. With watercolour pencil, draw in the inner eye
6. Paint the eye colour in the whole of the inner eye section and let dry
7. Paint or pencil in the black part of the eye and let dry
8. Dot a spot of white paint for the light in the eyes and let dry
9. Pencil in the eyebrows
10. Spray a light spritz of the finishing gloss - only a very light spray else it'll smudge and be ruined.

The finishing gloss I use is called 'Porcelain Gloss' and is from Sandra Lee's 'Floral Kraft' range. It is really meant for dried or silk flowers but works fine on the clay (unless using Sharpie pens as mentioned above!)

I have in the past used Sakura Glaze pens for the features and they have been fine, although when I tried recently, they too smudged! I think I need to let them dry completely before spraying on the finishing gloss - and then make sure to spray only one light spritz.

The difference in using watercolour pencils and Sakura pens may be seen in the photos above (from the top, the first picture shows pencil finish and the second picture, the Sakura Pen finish). The pencils give a much finer finish than the pens - but I think both work equally as well. Once the heads have the hair applied, the details of the face don't show up so much anyway.

I'm off now, to make some more - they are something I never tire of!