Pages

Showing posts with label paper doll. Show all posts

Tuesday, 3 March 2015

Let's Get Arty - with Lily in the Garden!


There's a new challenge blog which I heard about on Jan's blog
which looked interesting so I thought I'd join in with.

You can find all the details at

This is a 'Colour Swatch Challenge' and
the first thing to do was choose one of my photos
- here's Lily in the garden taken last year.

The colour swatches on the right have been generated
by a website called 'Chip It' 
and has turned my photo into a palette - how cool!

The challenge is to create a project using
at least 4 of the colours from the swatches.

I printed off the swatches and found some sari ribbon
which seemed to fit the bill.


(I only ended up using two of them though - along with some
other bits and pieces for the other colours).

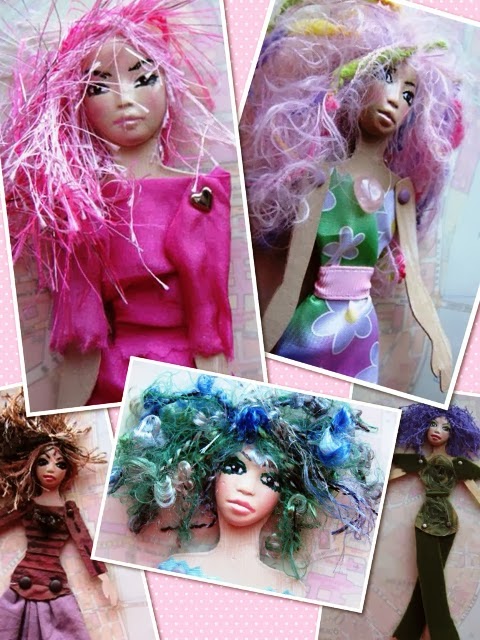
A paper doll came to mind, I haven't made one for a while.


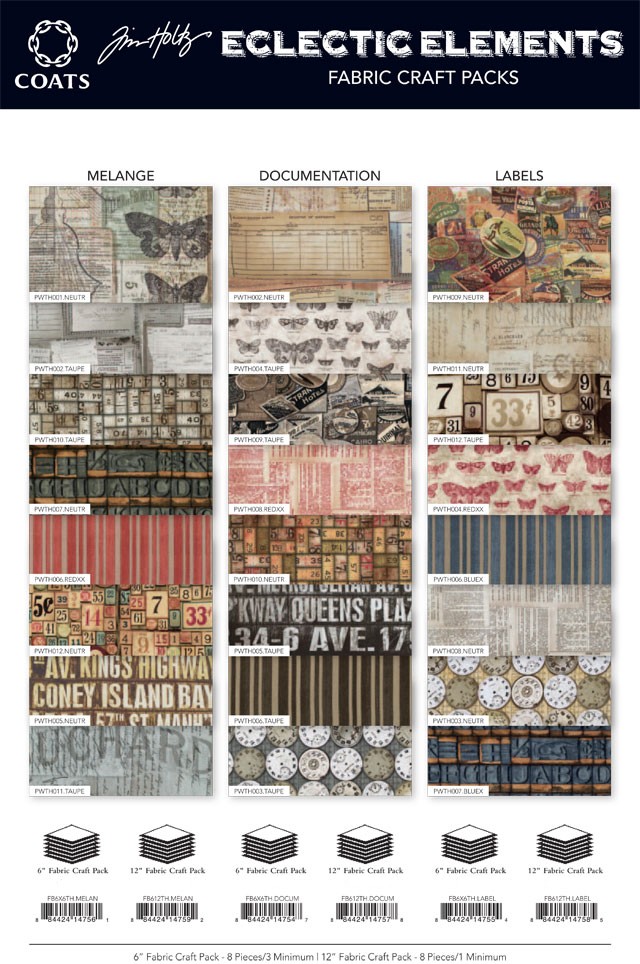
Using old packaging, I cut the body shape using
the above Sizzix die.


I rubber stamped one of the lovely faces from Clare Lloyd's
new set as show above - and glued it onto the die cut head.


I dressed the body with strips of the sari ribbon.

I gave her some hair using embroidery thread.


Did you notice her jewellery - a necklace and
matching bracelet of Rose Quartz.

So what colours did I use?
As close as I could get them anyway -
Nankeen - for the dress
Honorable Blue - also for the dress
Reverie Pink - the jewellery and legs
 (although you can't see the colour in the photos)
Tricorn Black & Porpoise - for the hair.

What a fun challenge!
Thanks for looking :)


Friday, 23 January 2015

PaperArtsy Blog Challenge No. 2: Shiny Stuff


I'm joining in again with PaperArtsy's next challenge
"Shiny Stuff".
Here's what Leandra says on her blog
"it's time to get in touch with your inner magpie! We are exploring metals, mica, beads, wire, jewellery, paint effects, Treasure Gold, in other words, all things shiny, rusty or metallic."

All the details may be found here
along with a YouTube video from Leandra which is what
actually inspired me to join in.

I made a paper sewing fairy called Phoebe (that name
apparently means bright, radiant and shining).

I'll show below with photos and not too many words how I made her.

 
 I used a stamp from Character Constructions
and some shiny plumber's tape which I roughed up a bit.


 I stamped onto card painted with 
Fresco Finish 'Sage' colour and stamped
the bodice part again onto the silver tape and layered it up.
The face is moulded from air dry clay.

 
I made the wings and bobbin feet with more of the silver tape
 stuck onto card and embossed with my Big Shot machine.
I coloured them randomly with a mixture of Viva Precious Metal Colour
and Alcohol Inks.  


 She's looking shiny!  
Next I added the arms with silver brads
and machine stitched the wings on.


With some 0.6 gauge silver coloured jewellery wire, I made
a cage to replicate the bottom of the dress form.

 
 Attached the face and wool hair with E6000 adhesive
and a wire hanging

(a hairbrush wouldn't go amiss!)
   

 Not very shiny at the back, but it's always good (I think) to
see how things are put together.

This current challenge runs for another 15 days so there's
plenty of time to get involved.

Thanks for looking :)

Monday, 10 March 2014

Introducing 'The Hillary Sisters'


Last week I heard about a 'Country Crafts Competition'
from Jan's blog who heard about it from Craft Blog UK.

The competition is being run by
If you send off for a free sample of one of these
fantastic fabrics from them -

Fabricswatches -hub -FINAL 

and make something crafty with it & blog about it,
 you'll be in with a chance of winning £1000!

So, without further delay, I sent off for a free sample -
I really loved the Bird Parade Teal, but knew I needed
something with a small print for what I had in mind, so
opted forthe Calluna Amethyst.

The very next day this arrived from Hillarys.

I wanted to make some paper dolls and clothe them
in the fabric - hence needing a small print.

This is briefly how I made the dolls.

From card, cut out the body parts -
and make a head from a mould using air dry clay.

Colour the parts with paint and markers.
I went on to make the facial features with 
water colour pencils and chalk blusher.

 Attach the arms and legs to the body
using small brads.

Now the best bit - using the fabulous fabric
to make some dresses for the 2 dolls -
who I called 'The Hillary sisters'!


 The older sister is dressed in a full length
sleeveless evening gown, accessorised with a 
gold coloured belt and shawl made from sari ribbon.


Her younger sister is wearing a shorter dress
(just above the knee) 
flared at the skirt and sleeves.
Her accessories are matching faux leather
belt and short boots.


 (The faux leather technique is described in
my previous blog post here.)
For the clothes I simply cut out the shapes
freehand from the fabric and stuck onto to
the card body parts with a white glue.


In this photo you can see the weave of
the fabulous fabric.
Oh, the hair, I should mention their hair!
I just happened to have a ball of fibres/wool  
in the exact colours of the fabric.
I do think a trip to the hairdressers is needed though!
Thanks for looking at my entry.
If you want to take part yourself, you only have until
Monday 17th March 2014 when requests for fabric will close 
- you then need to create your blog post by March 31st
 and email it to Hillarys.
Good luck :)

UPDATE:  Winner's entry may be viewed here
To see all the entries, look on Pintrest

Wednesday, 29 January 2014

The Seamstress Sisters


Here are my latest paper dolls -
five sisters called
Honey, Bluebell, Holly, Fuchsia & Marigold.
 They are Sewing Fairies.

I made one of these dolls a couple of years back
for a swap
 
 
 and once I'd worked out how I made her
(thank goodness I put a lot of detail in my original
blog post) thought I'd have a go at making some more.

The 'core' of each doll is an old clothing tag.
I had to peel the first (shiny) layer off in order for 
the Distress Stain to absorb into it.


I rubber stamped the dolls body onto card
and machined stitched it to the tag.
The stamp was from a set called
'Paperdoll Parts' from Character Constructions
by Catherine Moore.


There is some random rubber stamping on the back.

I replicated the form skirt with some wire.
This was a bit tricky but I like the finished result.


The 'feet' are two card bobbins stuck together,
covered with dressmaking tissue and Mod Podged
over - then machined stitched onto the body.


For the hair I used hand dyed (not by me)
 mohair fleece.  I love the natural waves in it.
As usual, the faces are moulded from air dried clay.


 The wings I cut from a piece of cotton fabric and
Mod Podged on some dressmaking pattern tissue.
I finished them off with some zigzag machine
stitching around the edge.


This green doll, Holly is my favourite
and she'll be adorning my wall above my sewing machine.


The other four I've put into my
Esty shop

Thanks for looking :) 

Wednesday, 8 January 2014

Hello Dolly!


I've made another ten dolls for my Etsy shop

This is the 'Genuine Gemstone Collection'
as each doll is wearing a tiny gem of some sort.
Rosie above for example, is wearing a
Rose Quartz around her neck.

Here's a couple of montages
showing a little snapshot of each doll.

 
 I made the outfits with their particular
gemstone in mind.


Hope you like them and
thanks for looking :) 

Friday, 22 November 2013

Hello & Etsy!

Hello Blog mates!

It's been that long since I last blogged, I'd 
almost forgotton how to do it!

Hope this finds you all well and happy.
I haven't been doing much craft-wise apart from the
obligatory family and friends' greeting cards.

I did buy some fabric a few months ago though
from the Tim Holtz Eclectic Elements range

fabric3 

I bought the 'charm pack' 5" x 5" little squares
and it's totally lush.
Then I couldn't decide what to do with it and it
sat on my desk for ages and ages.

I finally decided it'd make great little outfits
for paper dolls - what else would it be for me!!

So I busily got to work and made
 ten lovely mixed media dolls.

I'd often thought about opening an Etsy shop but never did -
these little dolls I made gave me the push to go ahead.

I'm useless at self promoting as it feels so un-natural to me.

However, the deed has been done so here's the link

https://www.etsy.com/uk/shop/GemstonePaperDolls?ref=si_shop
 If the link doesn't work (when you click on the pic)
there's a link near the top of my side bar.

I've called the shop 'GemstonePaperDolls'
because as well as loving making paper dolls,
I've also been buying a lot of genuine gemstones recently to
be made up into jewellery - although I don't know how
long that's going to take me to get around to! 
Got to start somewhere though I suppose.

I'll leave you with one of the dolls - she is actually
wearing a tiny little coral gemstone around her neck.

Her boots are real leather -
an upcycled old purse of mine.

Thanks for looking - 
I'll try not to leave it so long next time xx