Pages

Showing posts with label mannequin. Show all posts

Sunday, 19 January 2014

Mini Mannequins


I made these mini mannequins when I saw something
similar on Pintrest

The little beauties below were made by an Italian
lady whose beautiful blog is
 Porta-forbicine Mannequin 
I thought I'd use the Tim Holtz/Sizzix die 'Sewing Room'
for the mannequin shape


but found that to be too small compared to a pair of small scissors.
So, I used the Sizzix shape and cut around it to make it a bit larger.


The scissors still dwarfed it though, so I gave up on the idea
of making a scissors keeper manniquin and thought I'd make
a pin cushion mannequin instead.


However, that didn't work because I didn't use enough
wadding and the whole form is quite flat.

So, they are just mini mannequins!


I pinned them to a piece of decorative tape


... but didn't really like them when I hung them from a shelf
above my craft desk.


They are rather cute though and will make nice
little gifts.

I think I've got them out of my system now - or have I!

Thanks for looking :)

Monday, 22 November 2010

Footstool Revamped


Here's the old footstool revamped.

This is how it looked before


I've had this footstool for many years and when we moved into our present house (about 11 years ago) I put it under my craft desk pushed to the back and that's where it stayed - until now!

Here's what I did to transform it


Took the top and legs off and carefully ripped off the fabric.


I kept the old foam cushioning on.


I removed the covered buttons from the lid.


I used the old fabric as templates - much easier than measuring everything!


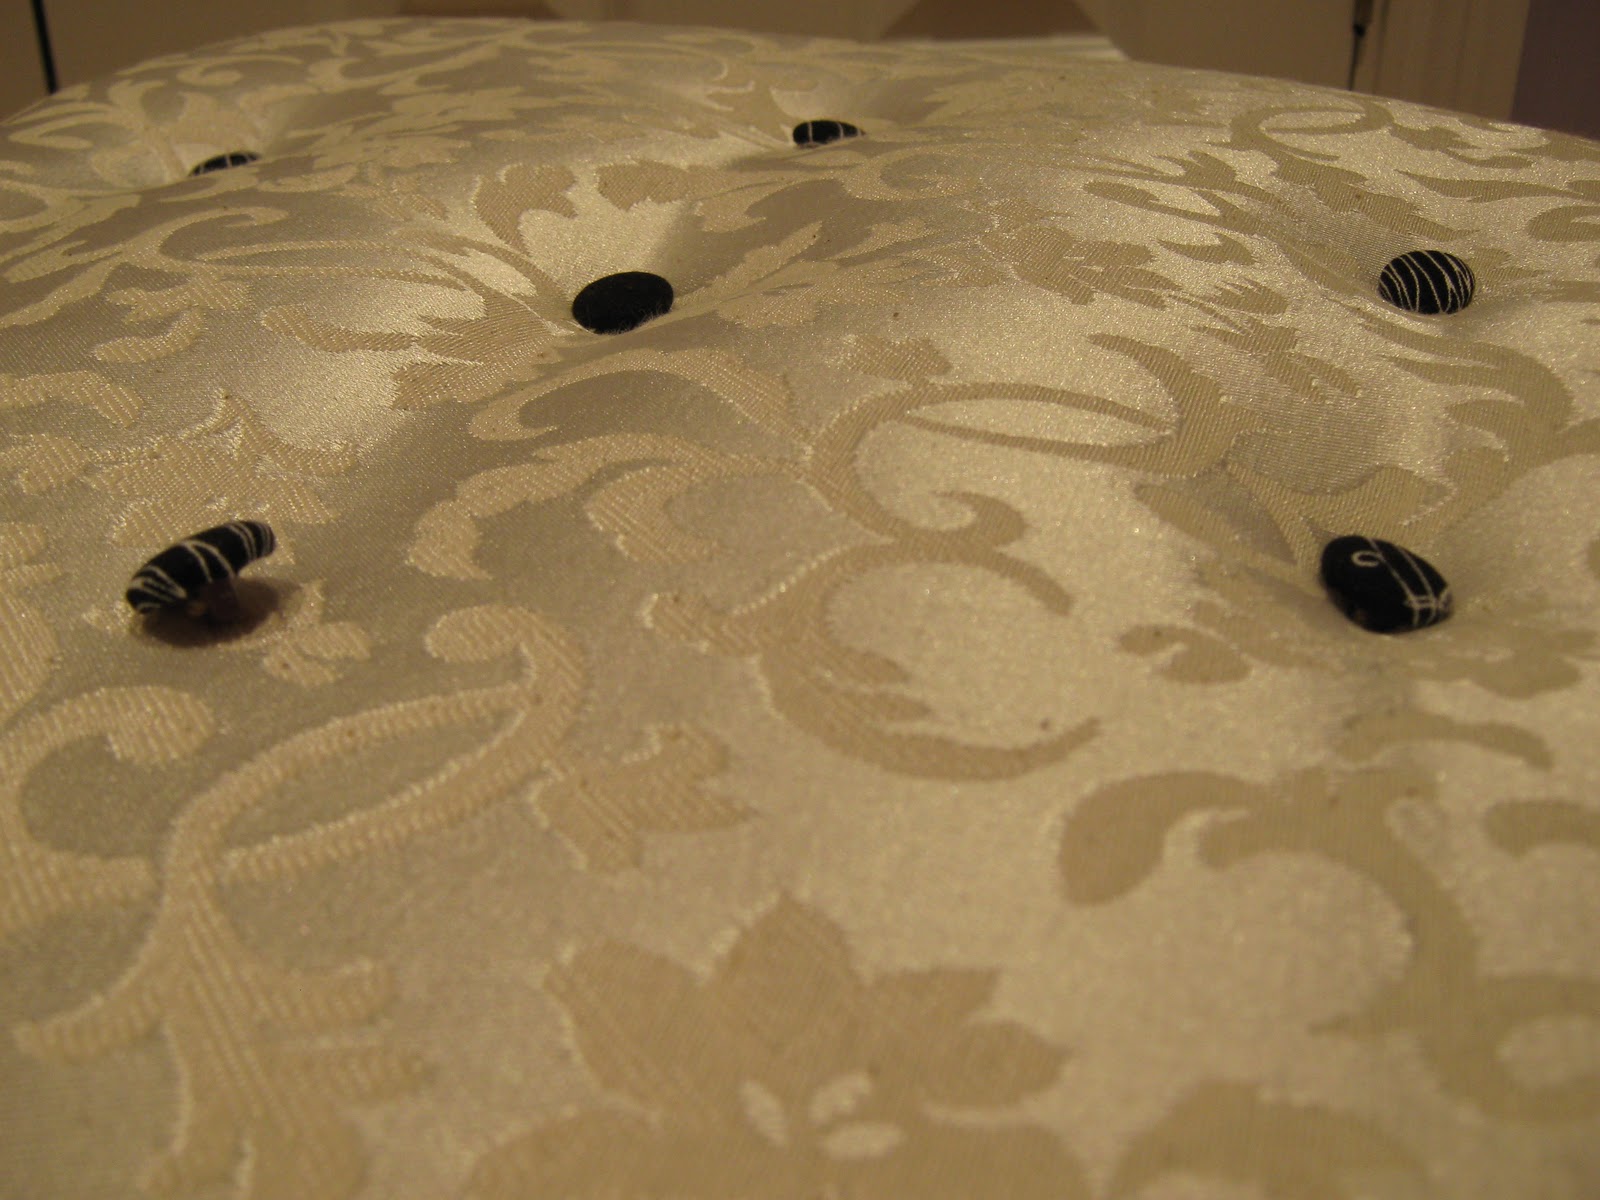
I covered some buttons with the black material and laid them out onto the fabric for the lid.


Using my trusty old staple gun, I attached the fabric around the bottom.  I love this fabric, but unfortunately didn't have enough of it to do the lid too.
The fabric is called Dress Forms by Michael Miller.


To cover the inside of the lid, I used the same fabric as for the top, it is a cream coloured brocade I've had in my material stash for ages.   As the 'Dress Form' fabric is black and white, I wasn't sure if using a cream coloured top was a good idea, but I think it works fine.  Ideally, I should attach some trim to cover the staples up - but that's for another day.


Apart from finding the corners difficult to re-cover - getting an acceptable mitred look wasn't easy, the only other thing I had trouble with was attaching the buttons to the top.  I decided to use the thread from the original buttons, but it wasn't long enough so I couldn't pull the thread through to the inside of the lid - doh!!  This means that the buttons are not as tight or as cushioned as they should be.  However, as I'm not a professional upholsterer, nor will I ever be, I think I did pretty well!

I didn't have to do anything to the legs (apart from dusting them!) as they were already black.


I've gone a bit mannequin mad lately as I bought a wire mannequin standing approx three foot high and two smaller ones which can be wall mounted.  One day soon I hope to make over the sewing area of my craft room and then all of these mannequins and the footstool can be nicely displayed -  if only I could get Kirsty Allsop in to give me a helping hand!

Thanks for looking x


Wednesday, 7 October 2009

Altered Jigsaw Piece


This puzzle piece is from a children's puzzle and measures just under 4" x 4".

The base was painted off white then rubber stamped with a 'Stamper Anonymous' stamp from the Tim Holtz collection called 'pattern pieces' which is one of my current favourites.  The smaller puzzle piece was stamped with a PaperArtsy mini stamp (MN20).


I then attached some vintage paper pattern pieces over the top with melted beeswax and coloured the edges with some dark brown and black melted wax crayons.

The holes to hold the embellishments and ribbon hanger were Crop-o-diled.


The torso / mannequin was moulded with air dried clay and covered with some more of the vintage paper pattern.


I think I may need to stock up on the beeswax now as I'd forgotton how enjoyable it is to work with - lol.

Sunday, 5 October 2008

Mannequin ATCs


I've joined another of the hosted swaps over on the DoCrafts forum. This one is a 'Mannequins' swap and is being hosted by Helen whose DoCraft's name is Smellihelli!
She said we could interpret the swap however we liked and I hope my interpretation is acceptable because I used a rubber stamped image of a dressmaker's form on a couple of the ATCs which I suppose isn't strictly the same as a mannequin as the dictionary defines it as a 'woman who models clothes'. Near enough I suppose - well I hope so anyway!
I couldn't resist using my favourite medium again - beeswax - I just love it! So all of the backgrounds have either dressmaking tissue paper or plain tissue paper beeswaxed onto them. The 'mannequins' are rubber stamped images onto Grungeboard (the pretty pink one and the yellow dressmaking one), the red one is rubber stamped onto metal which I then embossed and coloured with alcohol inks and finally, the one with the red button on is rubber stamped onto shrink plastic (that's why it's so tiny!)
Some lovely Mannequin ATCs have been appearing in the galleries and blogs of other participants and some absolutely stunning ones can be found in Sian's. I do hope that I'm lucky enough to get one of hers back in the swap. Wonder if Helen is taking bribes this time around - lol!!